Free Halloween pumpkin motif crochet blanket tutorial
There is something about October that makes every crocheter reach for orange yarn, and this pumpkin-motif blanket pattern is exactly the project to get your hook moving at a faster pace. It is an ideal project for beginners, offers endless customization possibilities, and delivers that look worthy of a farmhouse-style décor magazine. Whether you are decorating your own living room or selling a batch at an upcoming autumn fair, this tutorial details every stitch, material, and decision needed to transform a simple square into a standout seasonal piece. We have made this pattern dozens of times over the years, tweaking it based on customer feedback, yarn availability, and—to be honest—our own desire to break away from the overdone look of the classic “granny square.”
Handmade Halloween decor has surged in popularity in recent seasons, with pumpkin motifs at the heart of this trend. Consumers are looking for something cozy, pieces that reflect the time invested in their creation and carry a story. Artisans who share their pumpkin-themed blankets on social media consistently see higher engagement during September and October compared to other months, signaling that buyers are actively seeking out this specific type of item. If you have a stash of leftover yarn in orange, cream, and brown, now is the perfect time to put it to use and see just how much attention a well-crafted piece can draw to your small shop or personal portfolio.
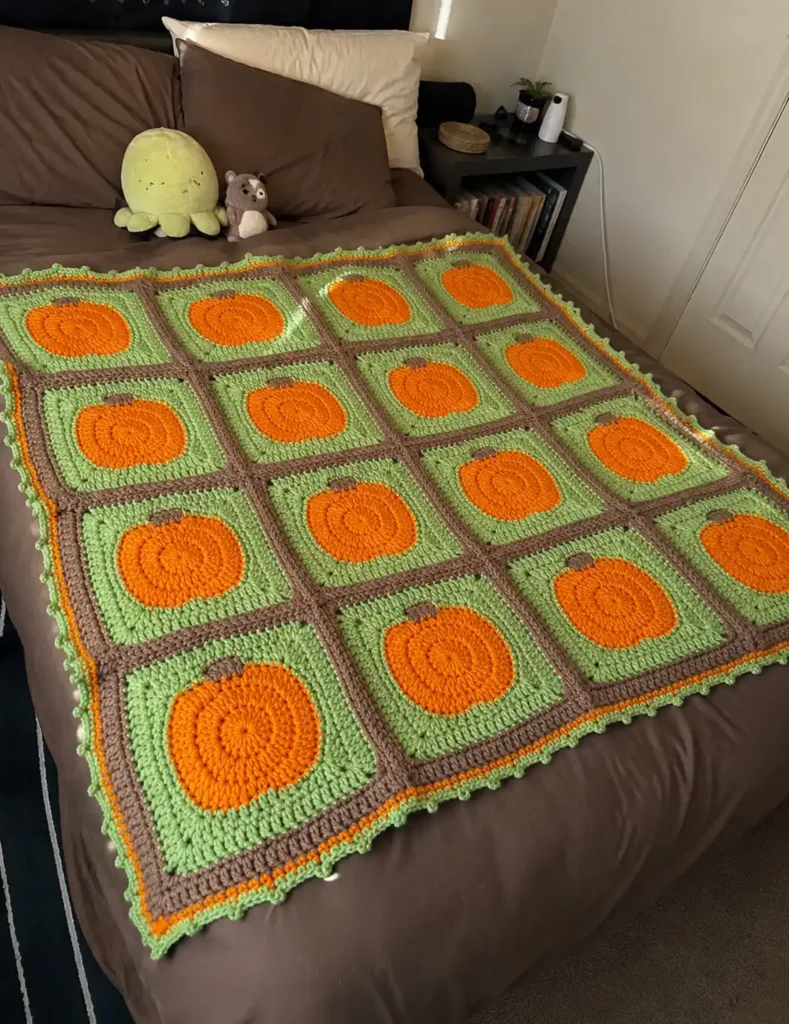
For this tutorial, we are following the beloved free “Pumpkin Patch” blanket pattern created by Sarah Zimmerman of Repeat Crafter Me and published by Yarnspirations; it remains one of the most ingenious granny-square-style patterns for autumn decor enthusiasts. Each motif begins with a magic ring in a pumpkin-orange shade, progressing through a few rounds of double crochet until the circle transforms into a textured, rounded square featuring gentle “lobes” that mimic the natural ridges of a real pumpkin. In the intermediate rounds, the color shifts to a leaf green and then to a warm coffee-brown; this transition creates the stem and tendril detail in one corner of the square, rather than placing them rigidly in the center. We recommend keeping the PDF open nearby when making one of these squares for the first time, as color changes happen quickly and it is easy to lose your place if relying solely on memory.
Materials needed before starting
Gathering the right materials beforehand saves a lot of frustration should you realize, well into the project, that you are missing a skein. For this blanket, you will need medium-weight yarn (category 4) in at least three shades: a warm burnt orange for the pumpkins, a soft cream or oatmeal tone for the background squares, and a dark brown or forest green for the stems and vines. Plan on using about six to eight skeins, depending on the desired final size, as a blanket of this type typically measures between 40 and 60 inches (approximately 100 to 150 cm) in width. You will also need a 5.5 mm (size I-9) crochet hook, a tapestry needle for weaving in ends, stitch markers to keep track of rows, and sharp scissors. Some crafters like to add black yarn to embroider small jack-o’-lantern expressions onto a few squares, adding a playful, spooky touch without overwhelming the design. Keep a notebook handy as well; noting down your gauge and square count right at the start will prevent you from having to unravel half the blanket later on.
Step-by-step: How to crochet pumpkin-motif squares
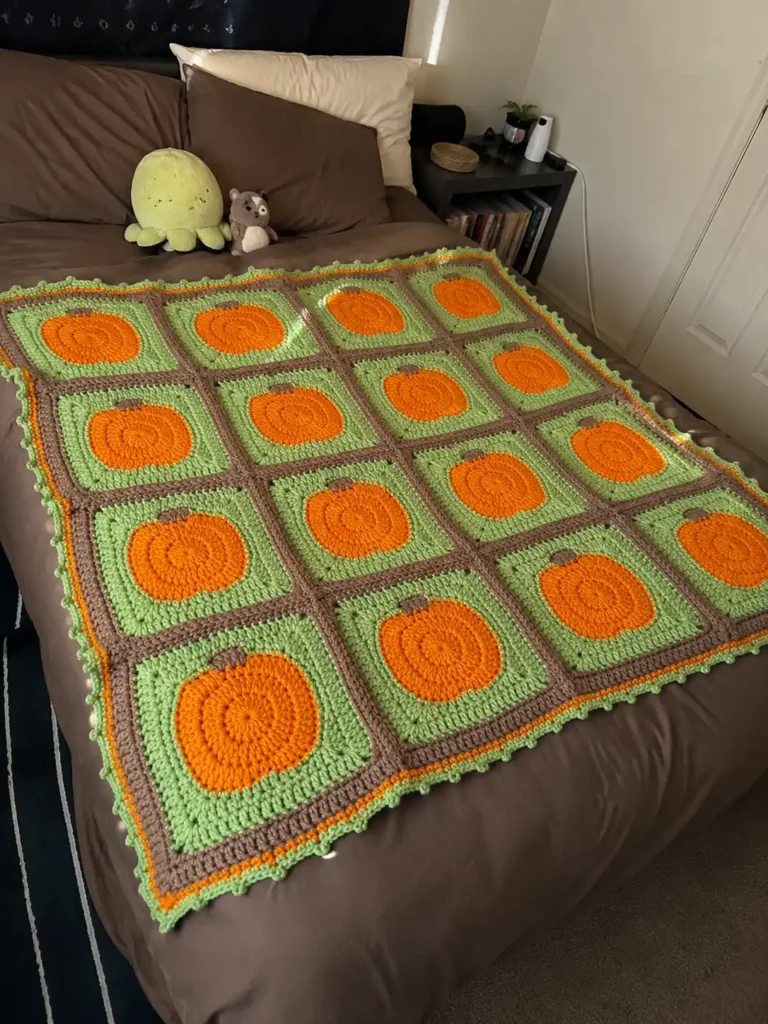
The official pattern calls for Red Heart Super Saver yarn—a medium-weight (worsted) acrylic that holds up very well to years of washing—in three colors: orange (“Pumpkin”), green (“Spring Green”), and brown (“Café Latte”). The project uses a 5 mm (US H/8) hook, resulting in a gauge of approximately 13 single crochet stitches and 14 rows per 10 cm (4 inches). A total of twenty squares are needed to complete the blanket, which measures about 76 x 96 cm (30 x 38 inches); this might seem like a lot, but each square takes only a few rounds to finish once you get the hang of the color changes. Each square is worked as a standalone project from start to finish in the round (rather than being worked in back-and-forth rows and shaped later); this is why the pattern is considered “easy,” even though the finished motif looks complex. If you want to make the blanket larger or scale it down to a baby security blanket (lovey), simply adjust the number of squares in multiples of four, as the final layout is based on a grid that allows for this exact division. Working the squares in stages is undoubtedly the most efficient approach here: make all twenty orange centers at once first, then work the green and brown rounds sequentially for all of them, rather than finishing one square completely before starting the next.
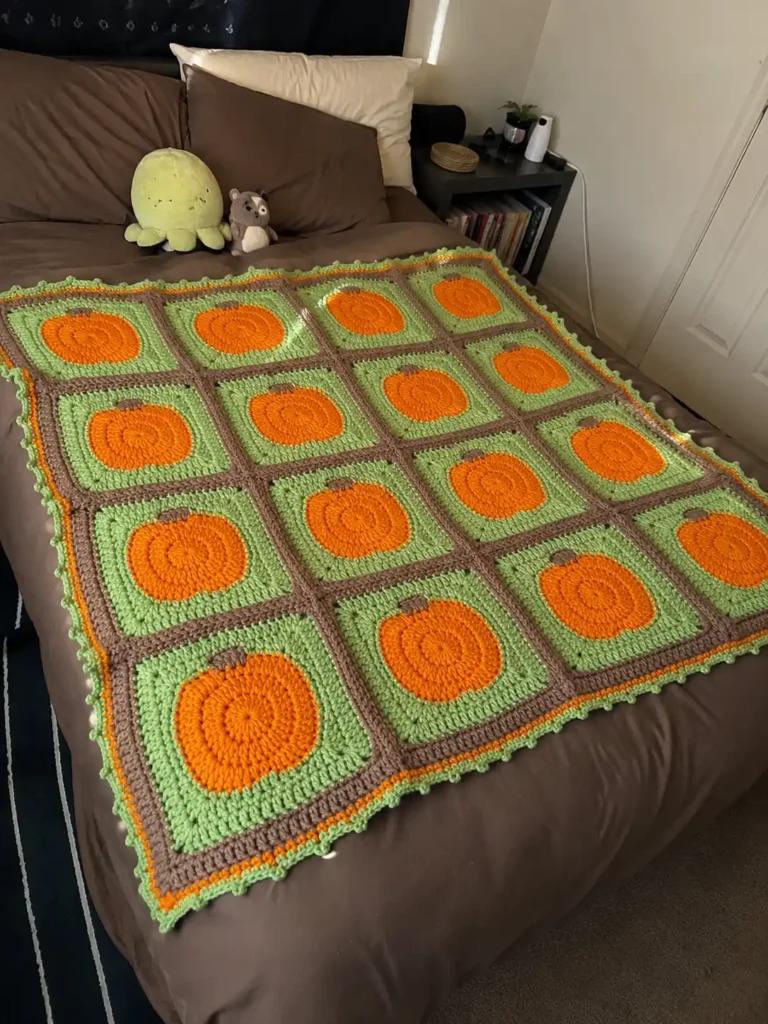
After completing all twenty squares and weaving in the yarn ends, assembling this design is surprisingly simple: the squares are sewn together to form four long strips of five squares each, and these strips are then joined to create the complete rectangle. Choosing to sew rather than crochet the pieces together offers greater control for precisely aligning the pumpkin ridges from one square to the next. Once the panel is fully assembled, the border ties the entire design together over three rounds, transitioning from brown to orange and finally to green; each round continues the work of the previous one using double and single crochet stitches evenly spaced around the perimeter, with extra stitches at the corners to ensure the piece lies flat. It is in the final round that the blanket gains its signature charm: a delicate green picot edge, created by working a few chain stitches and securing them with a slip stitch at regular intervals. This gives the border a gently wavy, tendril-like finish that echoes the stems of the pumpkins. It may seem like a minor technical detail, but it is precisely this kind of finishing touch that gives the handmade blanket a professional, well-designed look, elevating it beyond a mere “finished” item.
The difference between a good blanket and an excellent one often lies in the finishing touches rather than the initial construction. Carefully securing every yarn end, rather than rushing the process, prevents the piece from unraveling after repeated washings and ensures the back looks as polished as the front. Blocking the finished piece—even if just with a light steam treatment—evens out any tension variations between the squares and gives the blanket an impeccable, professional drape. Embroidering a few jack-o’-lantern expressions in black yarn on random squares adds a playful asymmetry to the design, creating beautiful photos for social media or sales listings. Quickly running a lint roller or fabric shaver over the blanket removes any loose fuzz; furthermore, folding the blanket to showcase the most attractive square makes a noticeable difference in the sense of professionalism the final product conveys to a potential buyer.
From hobby to artisan business: Taking the decisive step
Turning this pattern into a source of income isn’t as unlikely as it might seem; in fact, most successful shop owners we know started exactly where you might be right now: making a single blanket for their own sofa. It was only after posting a finished pumpkin-themed blanket online—and receiving a flood of comments asking where to buy one—that many crafters realized their hobby had quietly evolved into a viable side business. The transition usually begins modestly: a few custom orders from friends, then a booth at a local autumn craft fair, and finally an Etsy shop or Instagram presence as demand outgrows the capacity for informal fulfillment. The most important thing at this early stage is to take the craft seriously, even before it feels like a “real” business; this means tracking yarn costs, timing how long it actually takes to make each blanket, and photographing your pieces consistently and well. The crafters who achieve long-term success are rarely the ones with the greatest technical crochet skills; rather, they are the ones who treated their initial sales as sources of data, rather than just one-off favors for family members.
Charging too little is the most common mistake new sellers make, and it is something that can quietly kill a promising handmade-goods business before it even gets off the ground. Start by calculating the actual cost of materials—including every ball of yarn—and then add an hourly rate for your labor that reflects fair compensation rather than a pittance, even if the figure seems uncomfortably high at first. A queen-sized pumpkin-motif blanket, like the one in this tutorial, can easily take twenty-five to forty hours to complete, depending on your speed; that time must be reflected in the final price for the business to be sustainable. Many novice sellers panic when they see prices from major retailers and lower their own rates to compete, but customers looking for handmade goods generally aren’t comparing you to mass-produced items, but rather to other artisans; furthermore, very low prices often signal inferior quality rather than a great deal.
Nowadays, selling handmade products depends as much on the story behind the piece as on the quality of the craftsmanship, and Halloween-themed pumpkin blankets are incredibly photogenic products for gaining followers. Seasonal timing is key: promoting finished pieces in early September—well before the holiday rush—gives customers time to plan their gifts and decor, rather than leaving them scrambling at the last minute in late October, when your shop might already be out of stock. Short videos demonstrating the “puff” stitch technique or showing the blanket being unrolled tend to perform better than static photos on most platforms, as they allow potential buyers to see the texture and drape of the piece in a way a flat image simply cannot capture. Maintaining consistency throughout the season, rather than concentrating all efforts on a single, intense campaign in October, is usually what distinguishes an amateur seller from a business that customers return to year after year.
So, let’s improve?
If you are looking for a way to start a business and make a profit with crochet, the free Halloween pumpkin-motif crochet blanket tutorial is a great option. How about deepening your knowledge even further? Check out this link. It is worth noting that credit for the image and the pattern belongs to the official website.
Step by step: Free Halloween pumpkin motif crochet blanket tutorial
Spot on with this write-up, I actually suppose this website needs rather more consideration. I’ll most likely be again to learn way more, thanks for that info.